
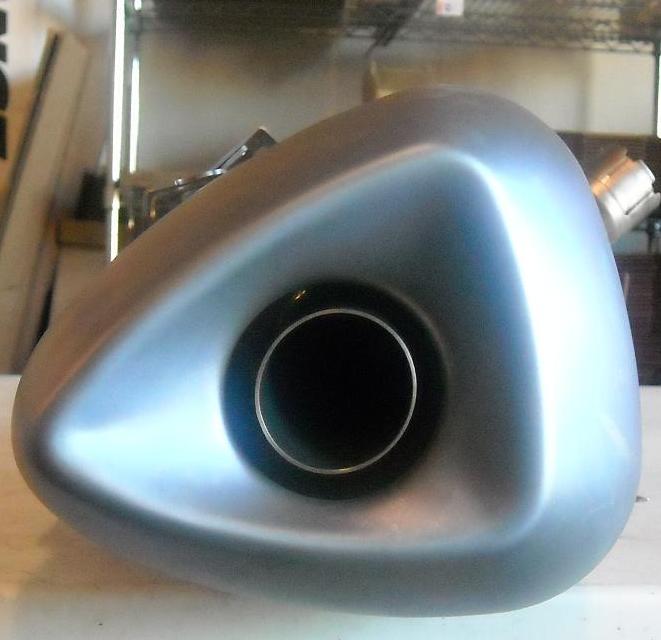
2009 Yamaha R1 Racing Baffles Installation Directions
Steps for disassembling, packing and reassembling of 2009 Yamaha R1 slip-on's: Read instructions fully before starting. Give yourself time to complete; you don’t want to damage anything on your bike. We do not guarantee proper installation. Install at your own risk.
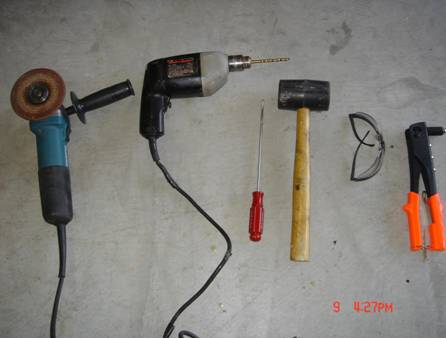
Tools needed for completion:
- 3/16 Titanium drill bit (make it 2 just incase you break one)
- Corded drill (most cordless do not provide enough power)
- Rivet Gun
- Loctight™
- Hammer, preferably a rubber mallet
- Safety glasses
- Dremel w/ cutting bit or grinder
- Screw drive
- Misc. socket sizes
- Allen Wrenches
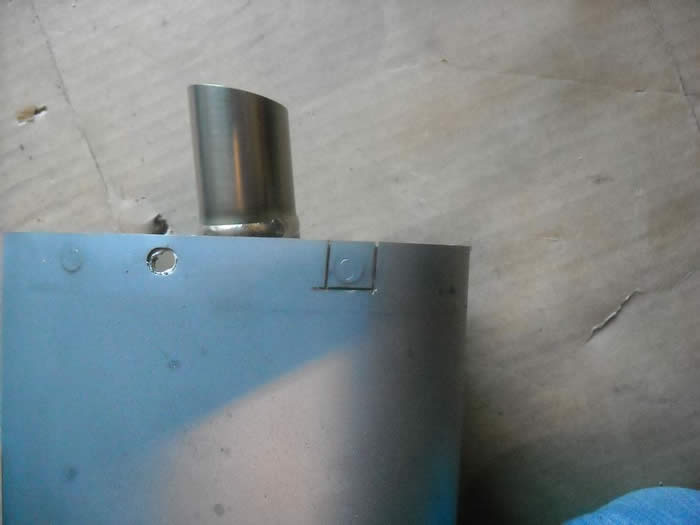
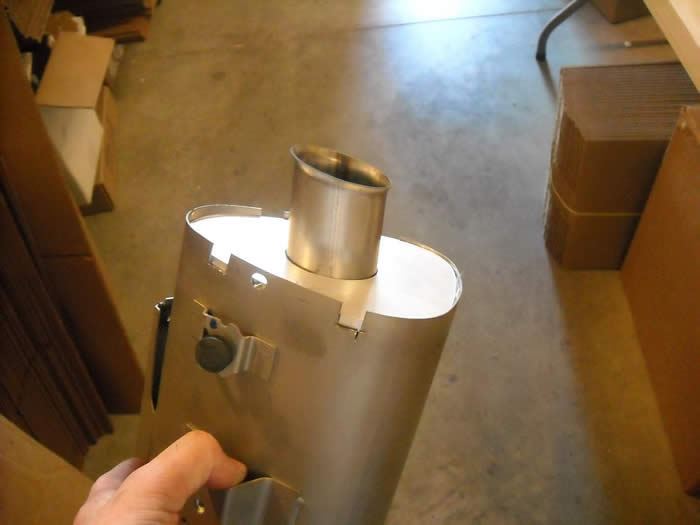
1. Using a pencil mark muffler and end cap so you don't mix the end caps up. Drill out the 3 end cap rivets using a 3/16" drill bit.
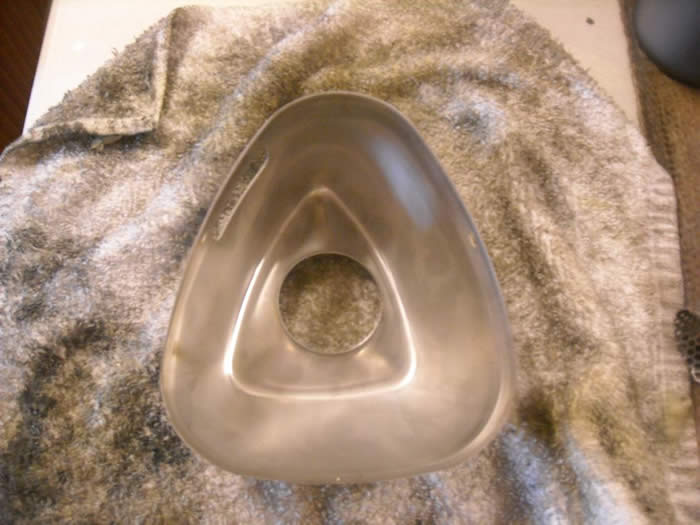
2. Remove end cap.
3. Using a dremel tool with cutoff blades, cut out the 4 weld marks. Be sure not to cut down to far into the can other wise you will see the cut when the end cap is installed.
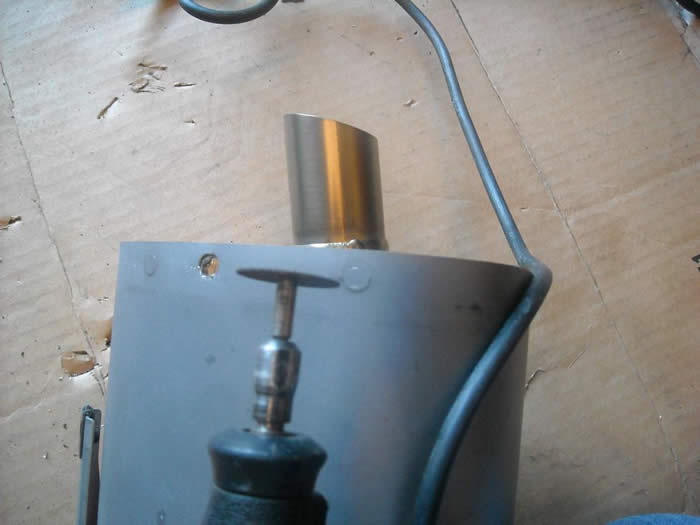
4. Be sure to completely cut the welds out. See photos below for reference.
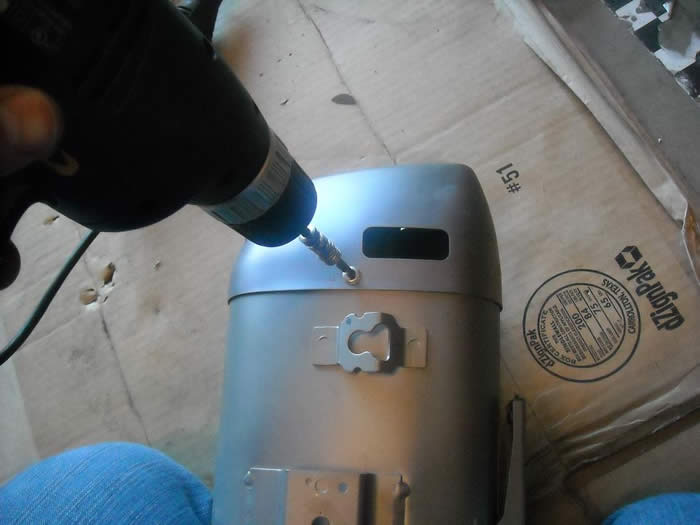
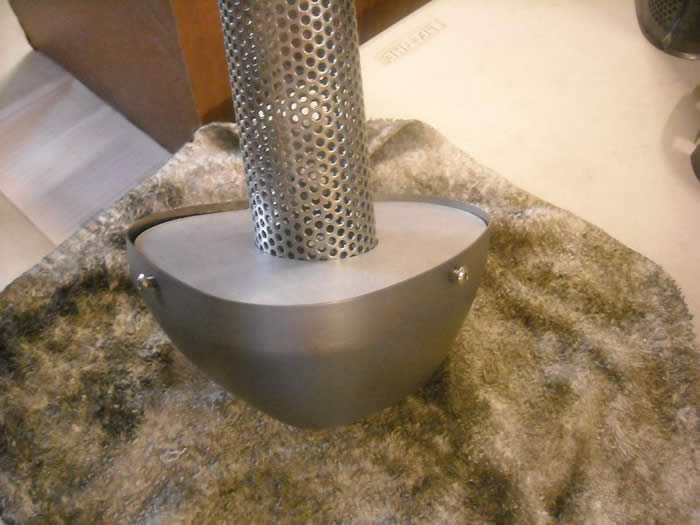
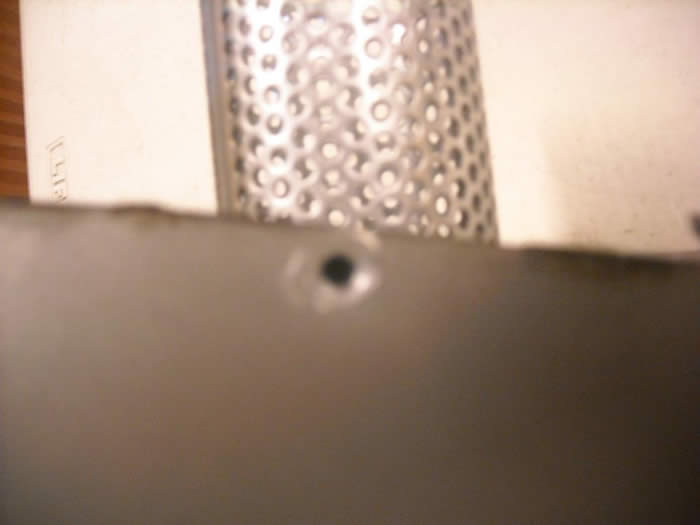
5. Using a 3/16" bit, drill a hole in the back of the muffler as seen in photo below.
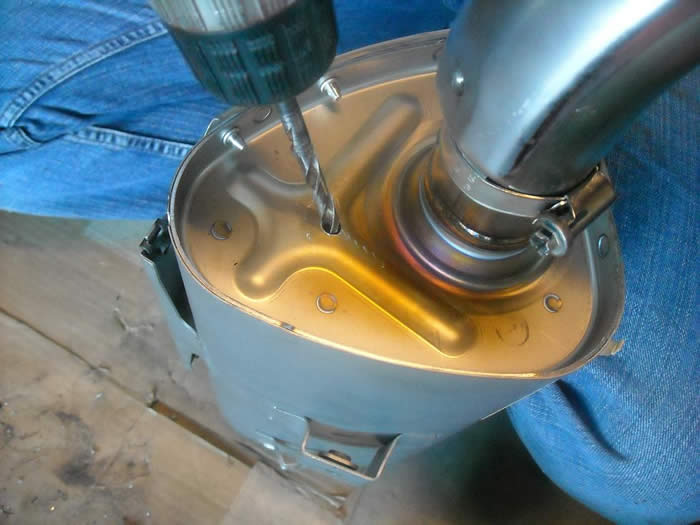
6. You will need a at least a 10" slim screw driver for this next step.
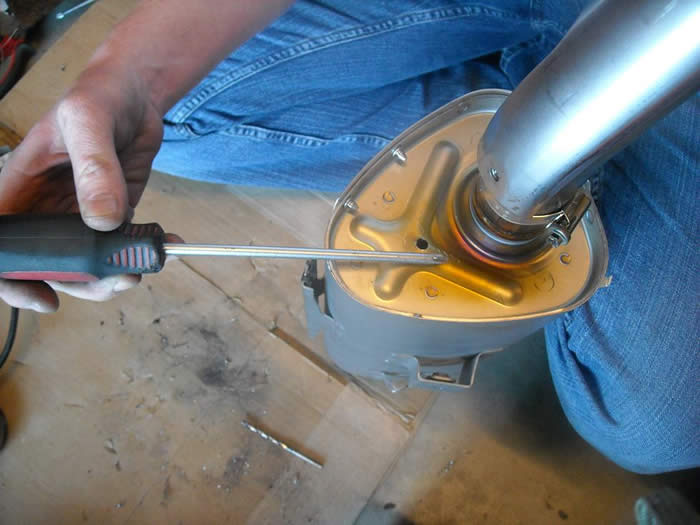
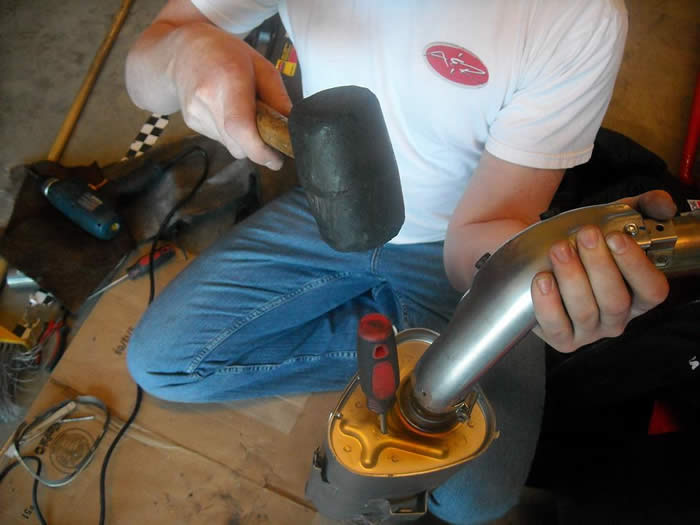
7. Insert screw driver into the drilled hole. Make sure the tip of the screw driver is pushed against the top of the baffle.
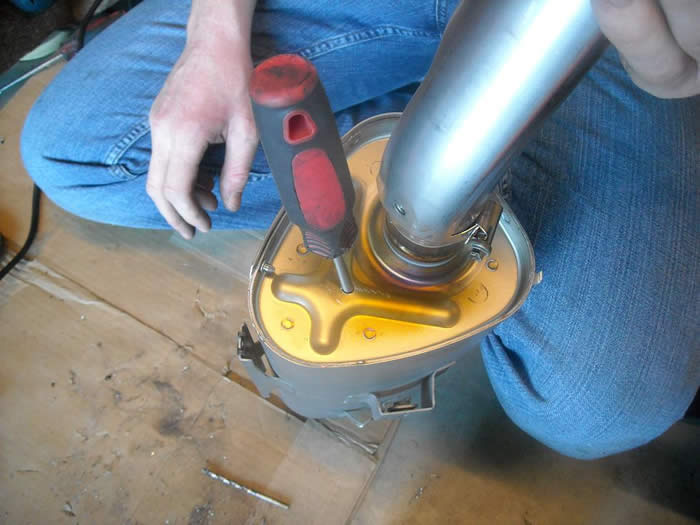
8. Using a rubber mallet or hammer, slowly tap the top of the screw driver. If you feel the screw driver has gone through the metal plate of the stock baffle, move the tip to a new location and start to tap again. This will take a lot of taps to get the baffle to slide down. Be patient. If you don't see the baffle slide down after a while, make sure you completely removed the welds.
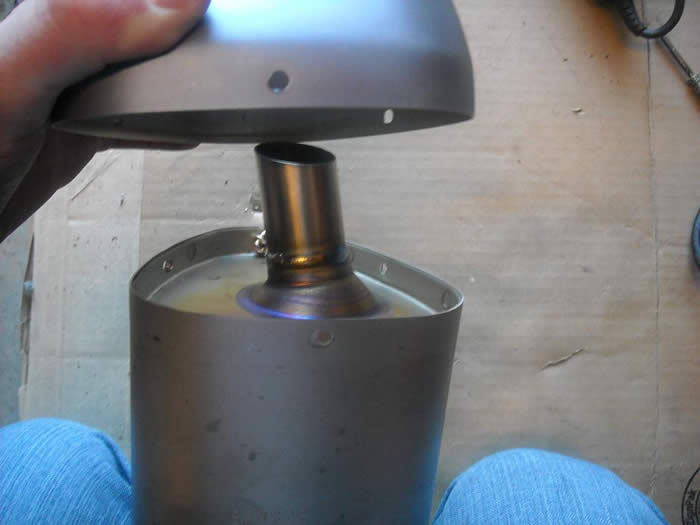
9. The OEM baffle insert will slide out as seen in photo below.
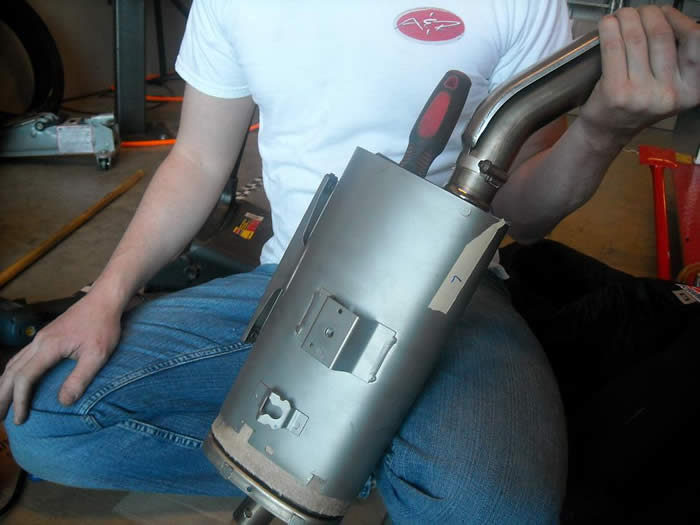
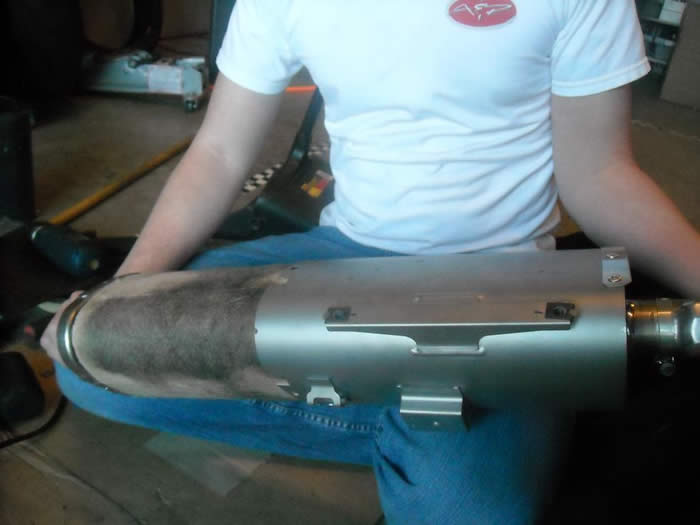
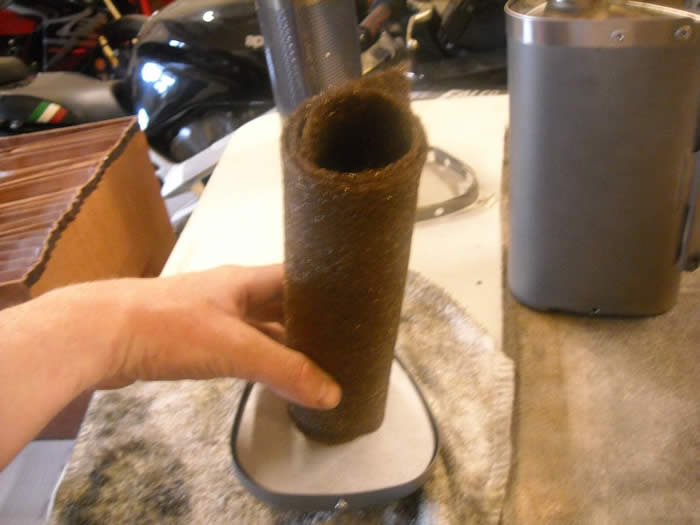
10. Pull the stock baffle out. Be careful not to damage the OEM packing material.
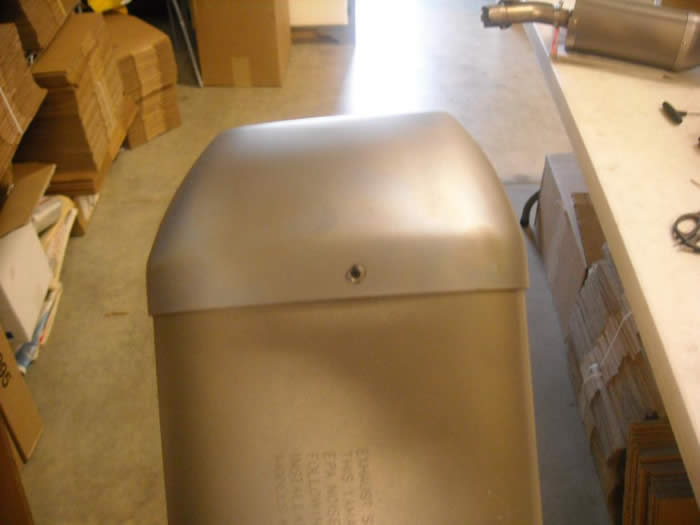
11. Using the provided rivet, seal the hole you drilled in the back of the can. Be sure to squeeze the handle of the rivet gun slowly to insure you have a tight seal.
12. Unwrap the OEM packing from the stock baffle.
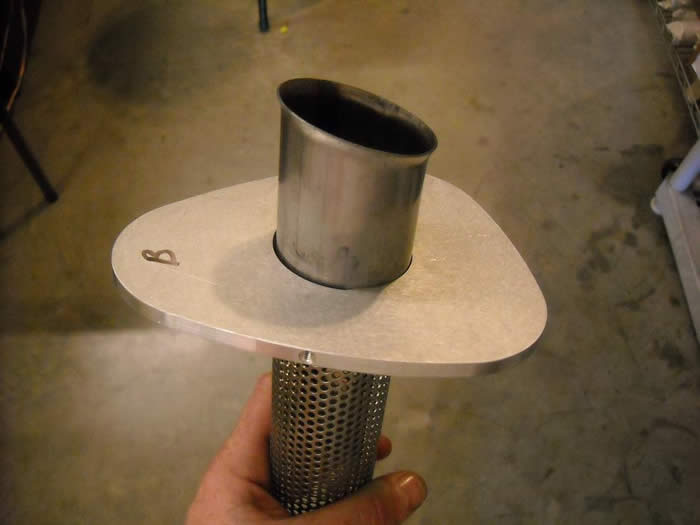
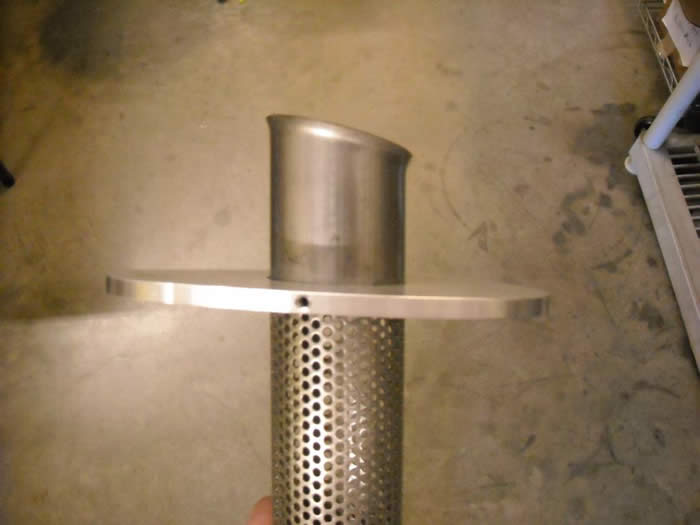
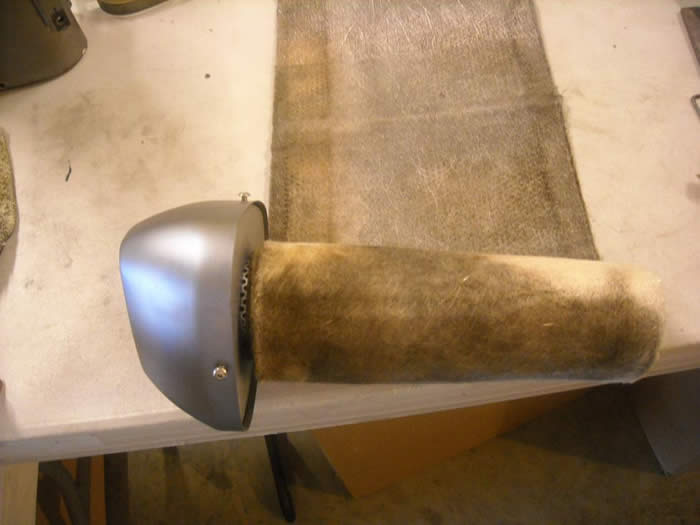
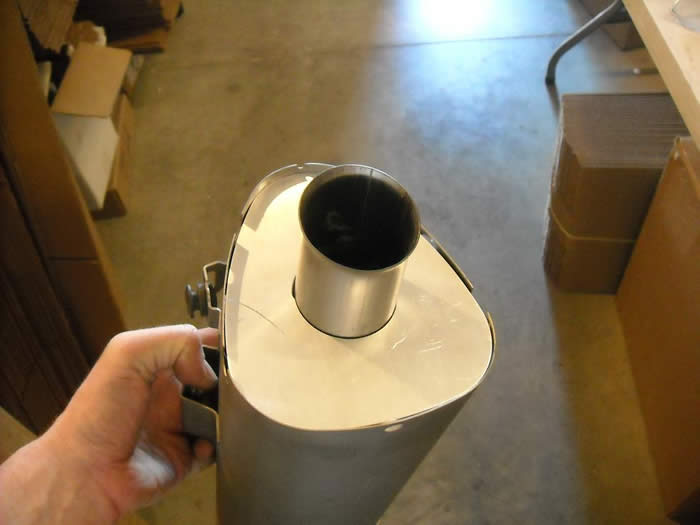
13. Insert baffle into the aluminum plate as seen in photo below. You can use WD40 to help side the plate down. Make sure the letter printed on the plate is face up. The angled part of the baffle goes toward the high point of the plate.
14. Lay the end cap face down on a towel as seen in the photo below.
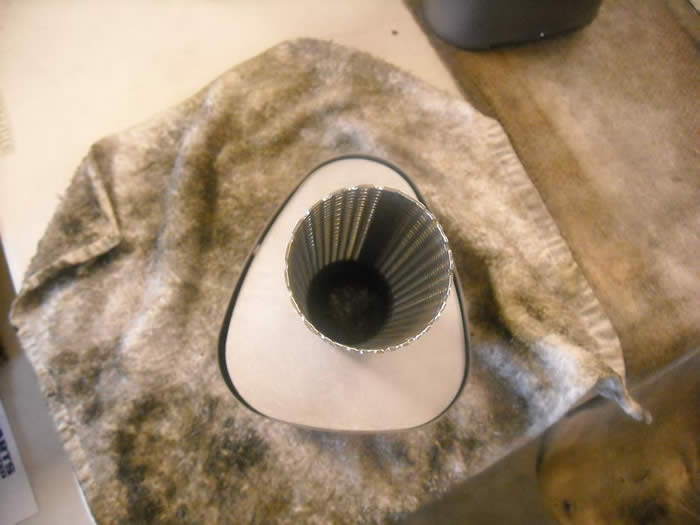
15. Insert baffle and plate into end cap as seen in photo below. You will complete this step to help align baffle.
16. Use provide screws to hold baffle and plate in place while you cover with packing.
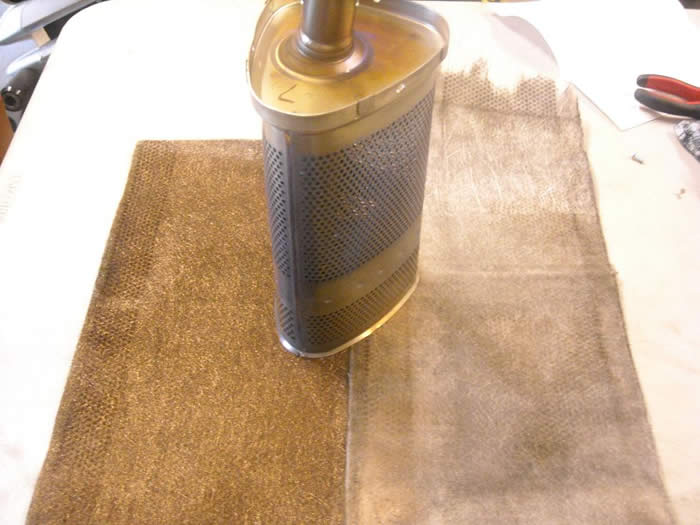
17. First cover baffle with copper mesh as seen in photo below.
18. Trim the copper mesh to the top of the baffle as seen in photo below.
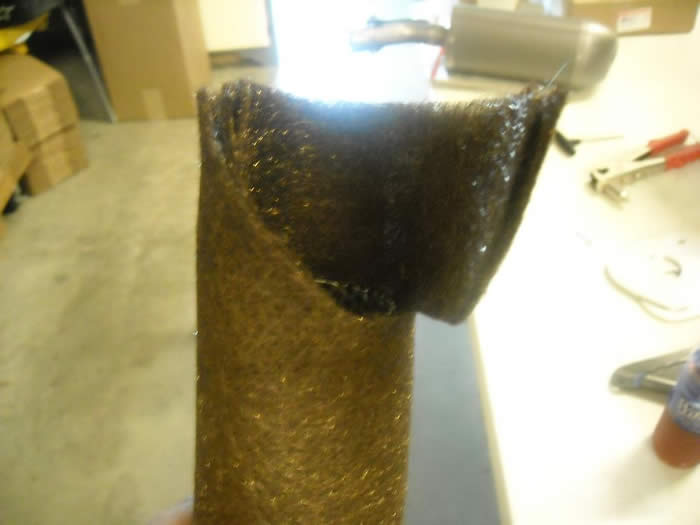
19. Next cover the baffle with the OEM fiber glass packing.
20. Trim the OEM packing down to the baffle.

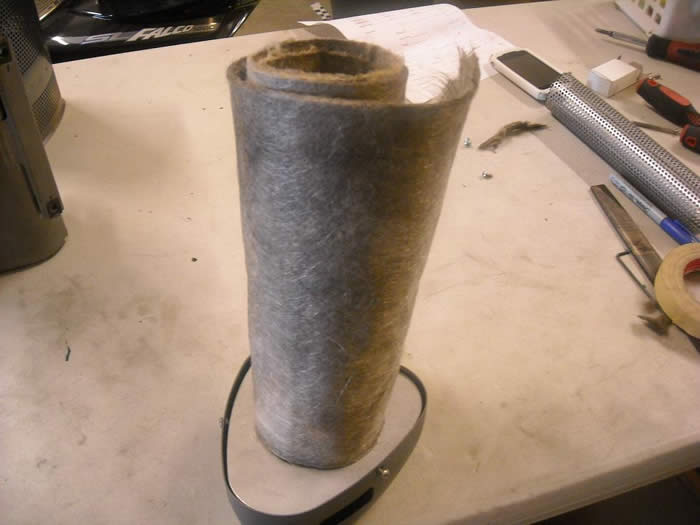
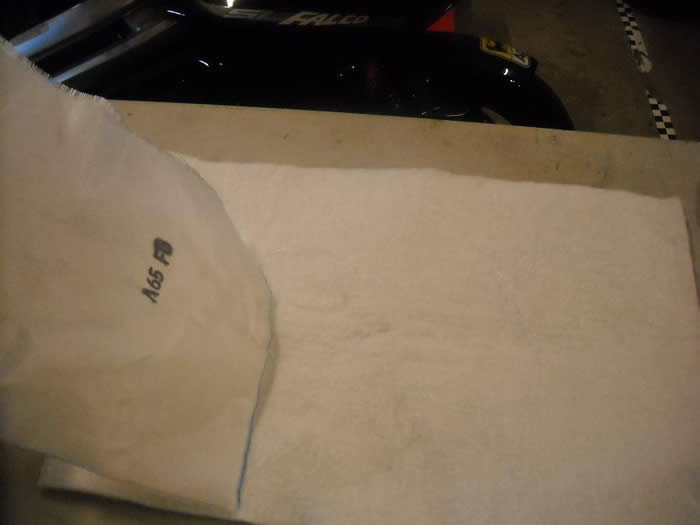
21. Remove the nylon mesh from the Vance & Hines fiber glass packing as seen in photo below.
22. Cover the baffle with the Vance and Hines packing.
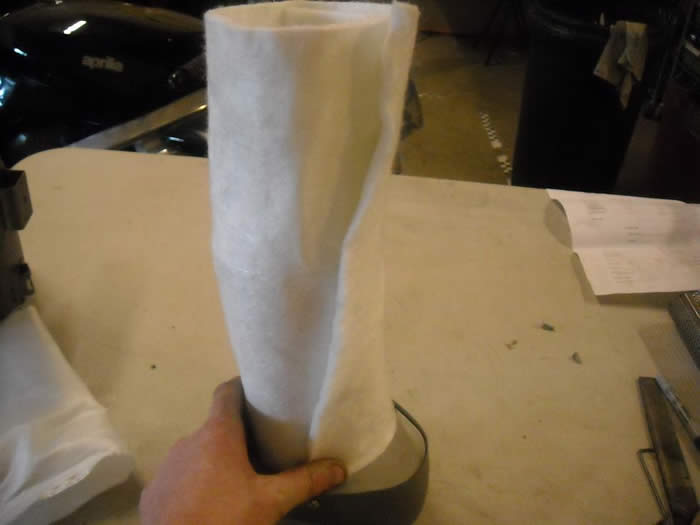
23. Using the safety wire, make 2 bands to hold the packing in place as seen in the photo below.
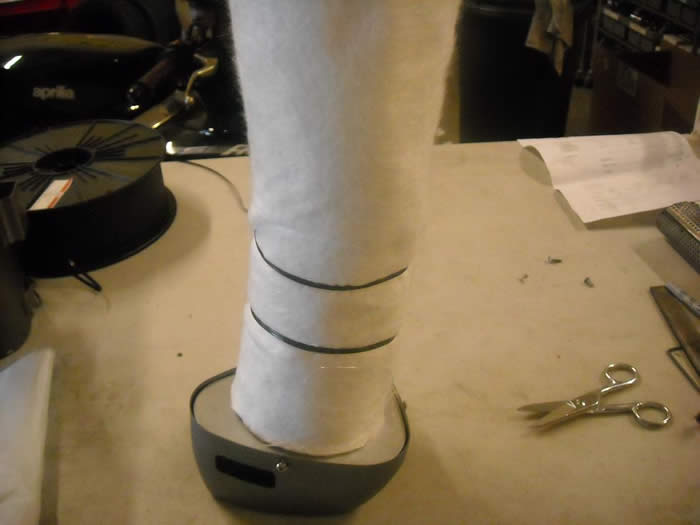
24. Trim the Vance & Hines packing 2.5" from the top as seen in photo below.
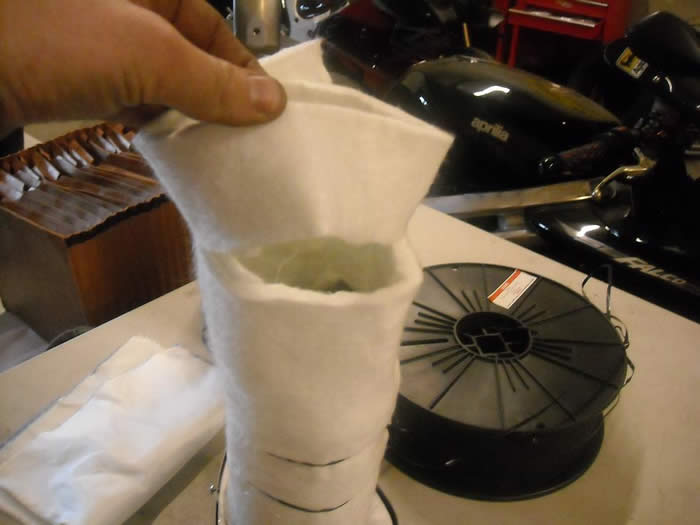
25. Remove the baffle from the end cap. Be sure the baffle plate does not slide down the baffle. This will throw your alignment off. If the baffle does move, reinstall in the end cap to realign.
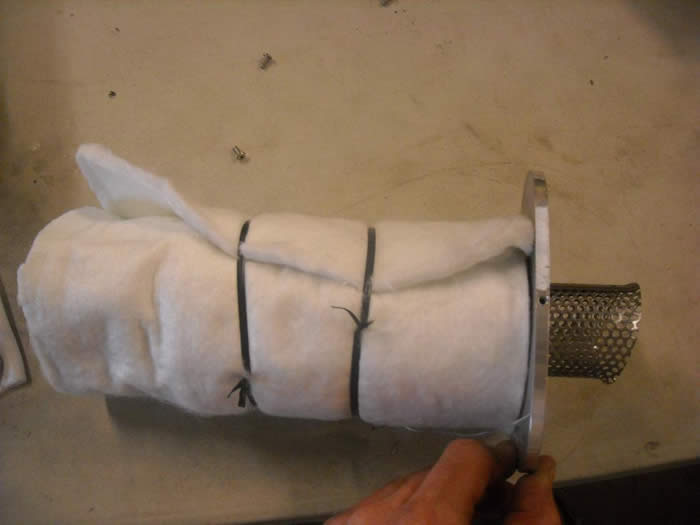
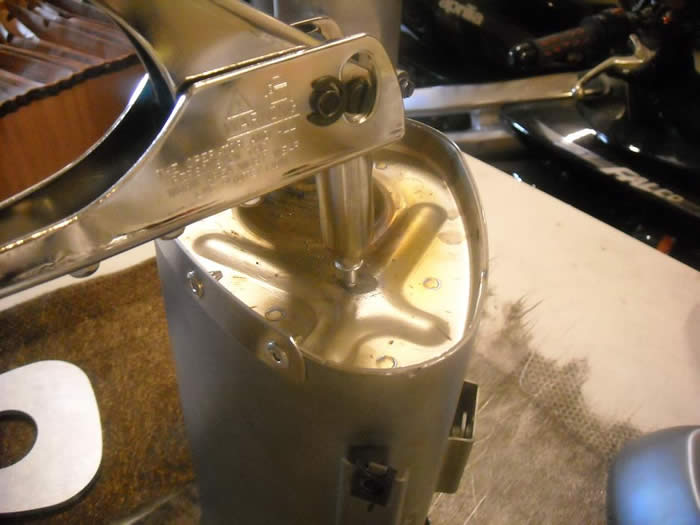
26. Install the baffle and plate into can as seen in photo below. When installing baffle, make sure you line up the back end of the baffle with the tubing coming up from the inside of the muffler can.
27. Align all 3 screw holes.
28. Install the end cap and align the holes with the can and baffle plate. Install the 3 button screws. We recommend using blue Loctight. Do not over tighten the screws. YOU WILL STRIP THE ALUMINUM PLATES IF YOU ARE NOT CAREFUL.
29. Reinstall the mufflers back on the bike.
*Warning, do not stand behind bike when you start it for the first time after baffles are installed. Small pieces of fiberglass packing material will be ejected.